> ## Documentation Index
> Fetch the complete documentation index at: https://docs.paysight.io/llms.txt
> Use this file to discover all available pages before exploring further.
# Connecting Paysight with NMI
> Learn how to connect your NMI account and configure API Key routing for Paysight, including setup for MID accounts.
This guide shows you how to connect your NMI account to Paysight using the API Key for secure, reliable payment processing.
## Pre-requisites
Before you begin, ensure you have:
* Access to your **NMI Admin Dashboard**
* The ability to generate API keys in NMI (requires 2FA and admin permissions)
* Paysight Account
* For multiple MID accounts: **Processor IDs** will be needed
## NMI MID Setup Guide
1. **Login** to your NMI account
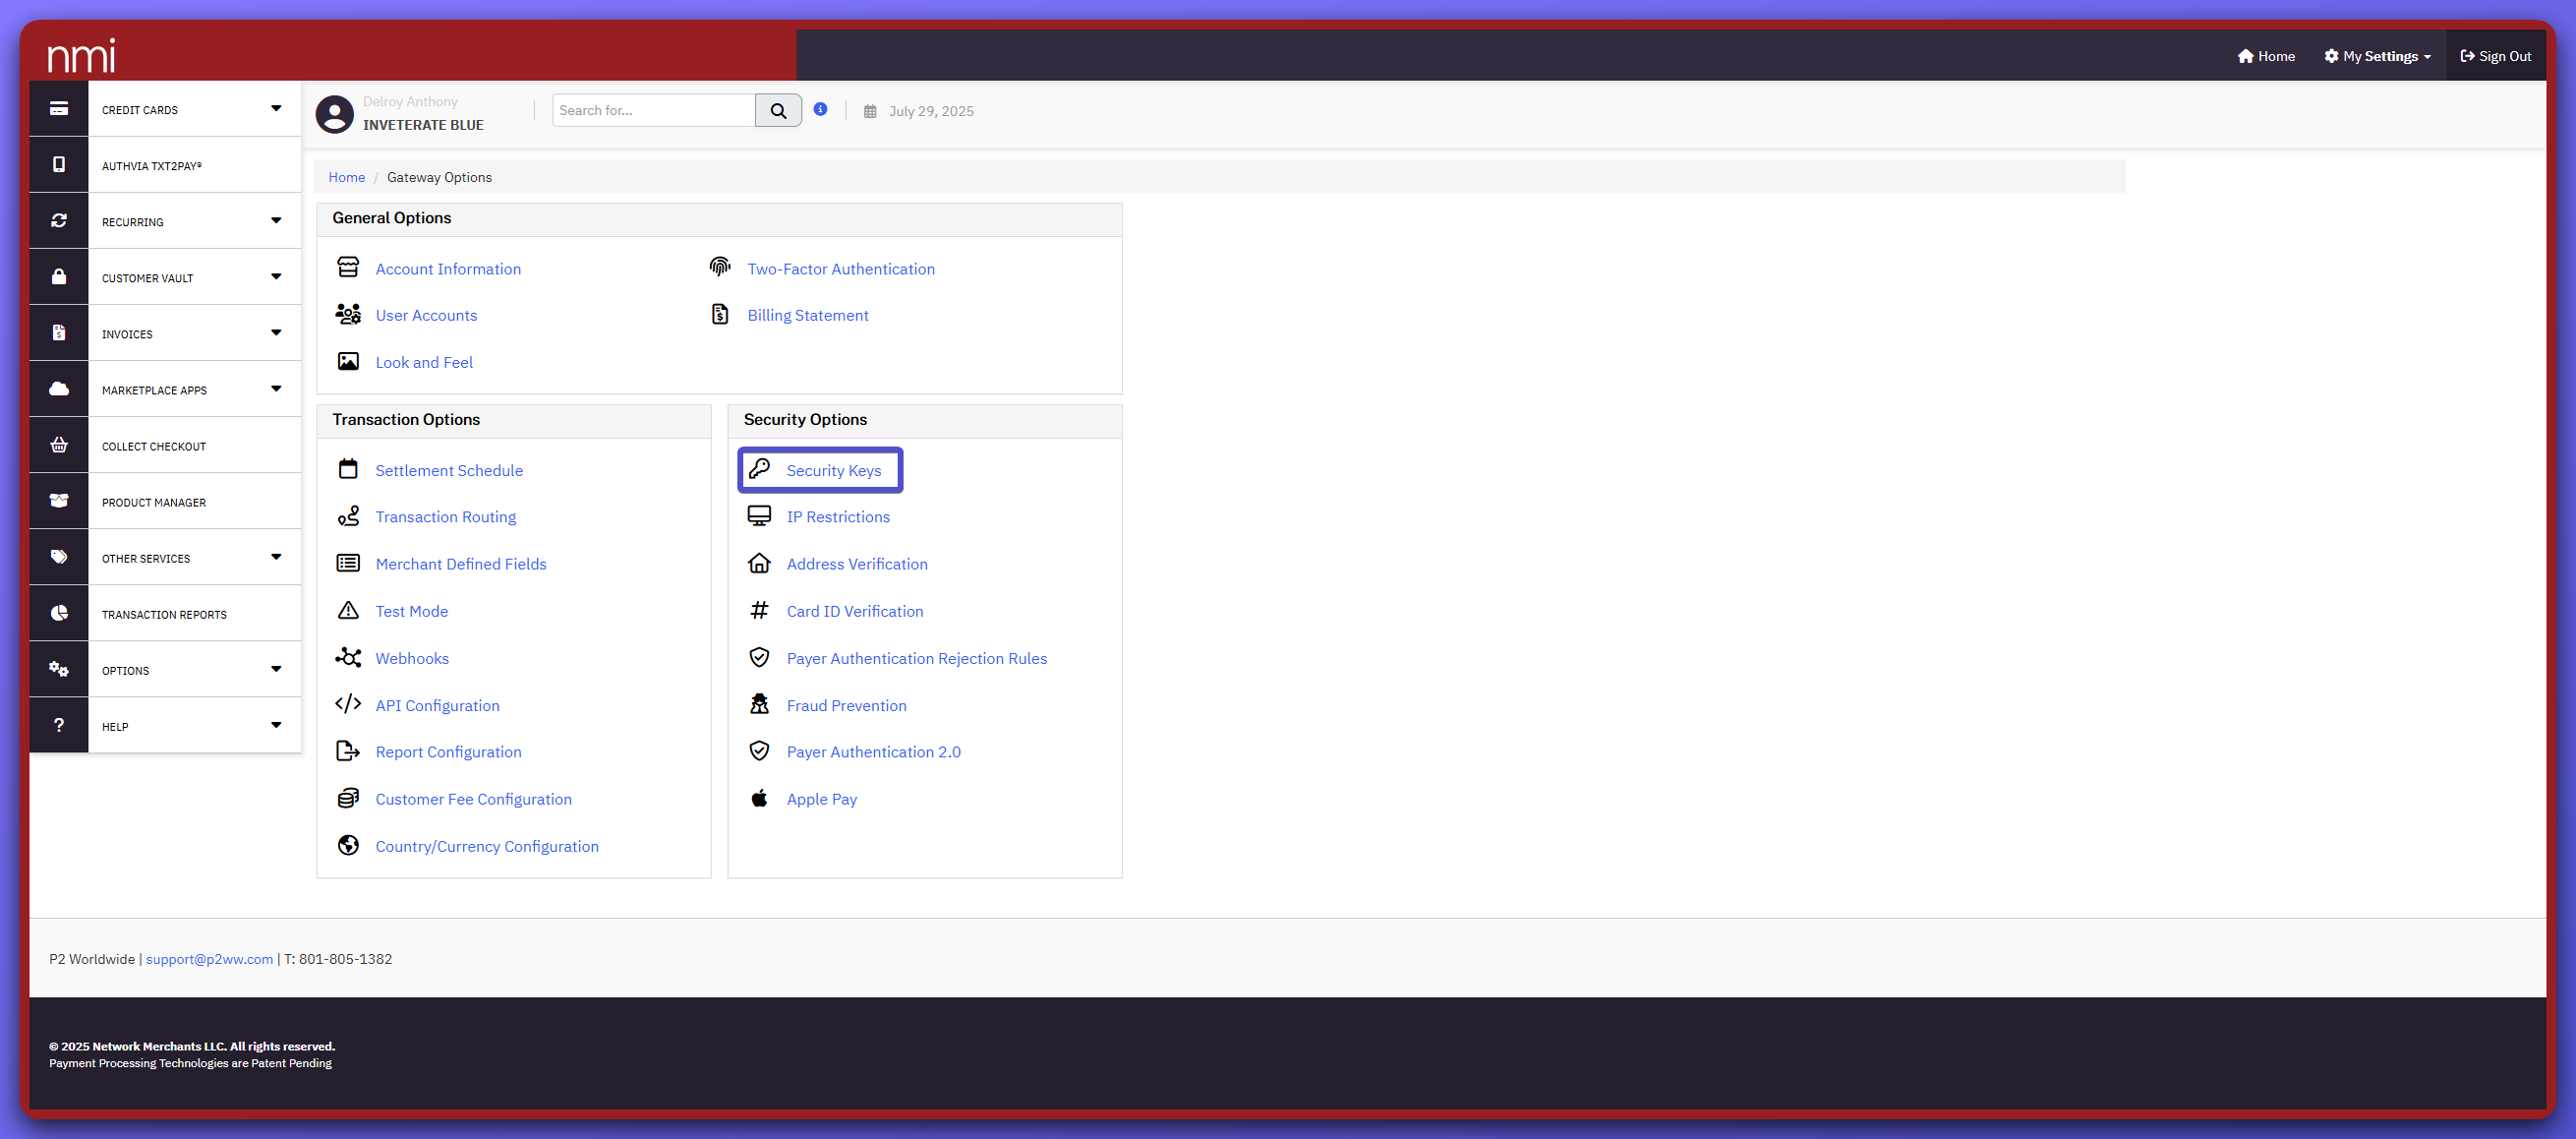
2. Navigate to `Options` > `Settings` > `Security Keys`
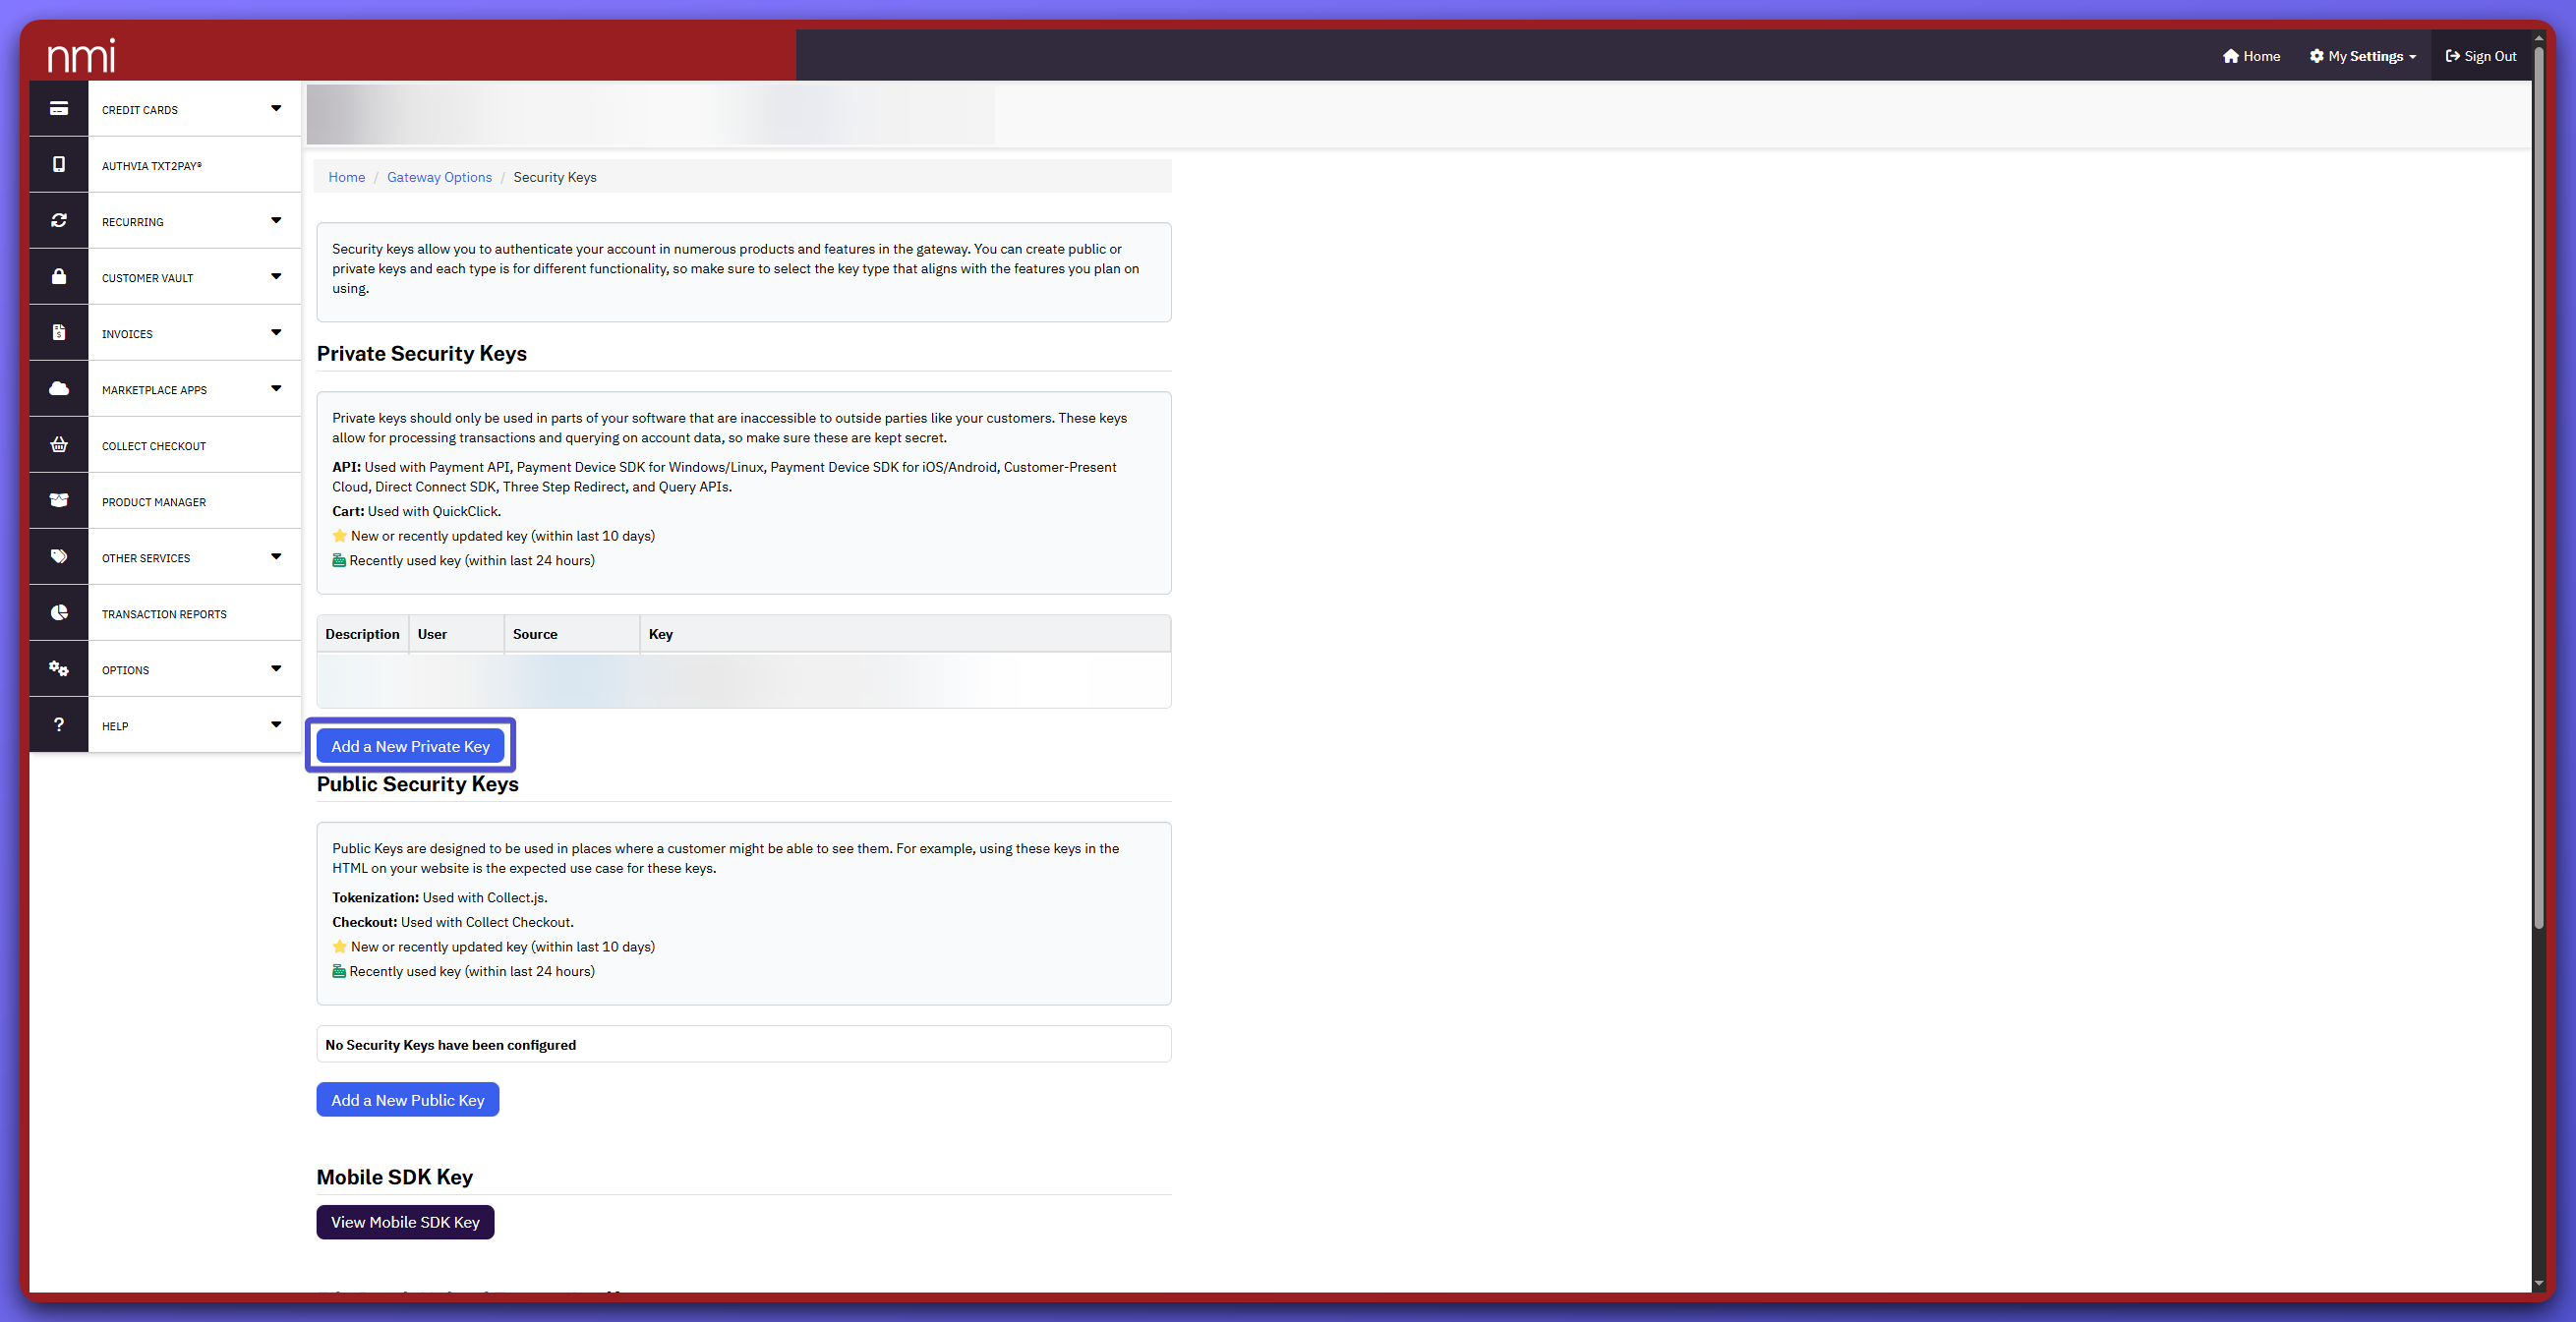
 3. Click `Add a new Private Key`
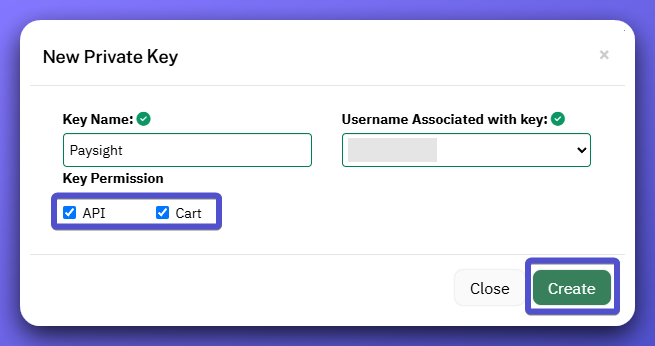
 4. Name the key as 'Paysight' and associate the key to the desired account
5. Tick both `API` and `Cart`
6. Click `Create` and copy the generated API Key securely
4. Name the key as 'Paysight' and associate the key to the desired account
5. Tick both `API` and `Cart`
6. Click `Create` and copy the generated API Key securely
 If your NMI account has multiple MIDs:
* Each MID will have a unique **Processor ID**.
* Record the Processor IDs, we will need them to route specific transactions from Paysight to the correct MID.
* If you don't set a Processor ID, transactions will go to the default MID.
You can check the Processor IDs navigating to:
1. `Options` > `Settings` > `Transaction Routing`
2. You can check the Processor IDs and it's configurations, it's important to include that ID for MID boarding.
* The API will be used for MID boarding. Ensure that the details inputted at onboarding form is correct.
* If there are multiple MID accounts, put the Processor ID under notes on the form.
* Your Paysight Account Manager will onboard that MID and do a test transaction.
## Troubleshooting & FAQs
* **How do I route to a specific MID?**\
Provide the correct Processor ID in Paysight setup. If omitted, payments will use your default MID.
* **What if my test payment fails?**\
Double check your API Key, permissions, and Processor ID. Make sure your key is active and assigned to the intended account.
* **More Help:**\
Contact your Paysight Account Manager or visit the support section in your Paysight Dashboard.
## Other Guides and Resources
Step-by-step guide for requesting to connect a Merchant Account.
Check your transactions with diverse filtering, detailed information, refunds and transaction types.
Analyze performance, payments and trends with Paysight Reports
Learn how to use Retry Strategy to minimize customer disruptions.
If your NMI account has multiple MIDs:
* Each MID will have a unique **Processor ID**.
* Record the Processor IDs, we will need them to route specific transactions from Paysight to the correct MID.
* If you don't set a Processor ID, transactions will go to the default MID.
You can check the Processor IDs navigating to:
1. `Options` > `Settings` > `Transaction Routing`
2. You can check the Processor IDs and it's configurations, it's important to include that ID for MID boarding.
* The API will be used for MID boarding. Ensure that the details inputted at onboarding form is correct.
* If there are multiple MID accounts, put the Processor ID under notes on the form.
* Your Paysight Account Manager will onboard that MID and do a test transaction.
## Troubleshooting & FAQs
* **How do I route to a specific MID?**\
Provide the correct Processor ID in Paysight setup. If omitted, payments will use your default MID.
* **What if my test payment fails?**\
Double check your API Key, permissions, and Processor ID. Make sure your key is active and assigned to the intended account.
* **More Help:**\
Contact your Paysight Account Manager or visit the support section in your Paysight Dashboard.
## Other Guides and Resources
Step-by-step guide for requesting to connect a Merchant Account.
Check your transactions with diverse filtering, detailed information, refunds and transaction types.
Analyze performance, payments and trends with Paysight Reports
Learn how to use Retry Strategy to minimize customer disruptions.