Who is this for?
This guide will be for anyone setting up a new shop or business in Paysight. Follow these steps to add your brand details, configure email settings, and get your portal ready.Pre-requisites
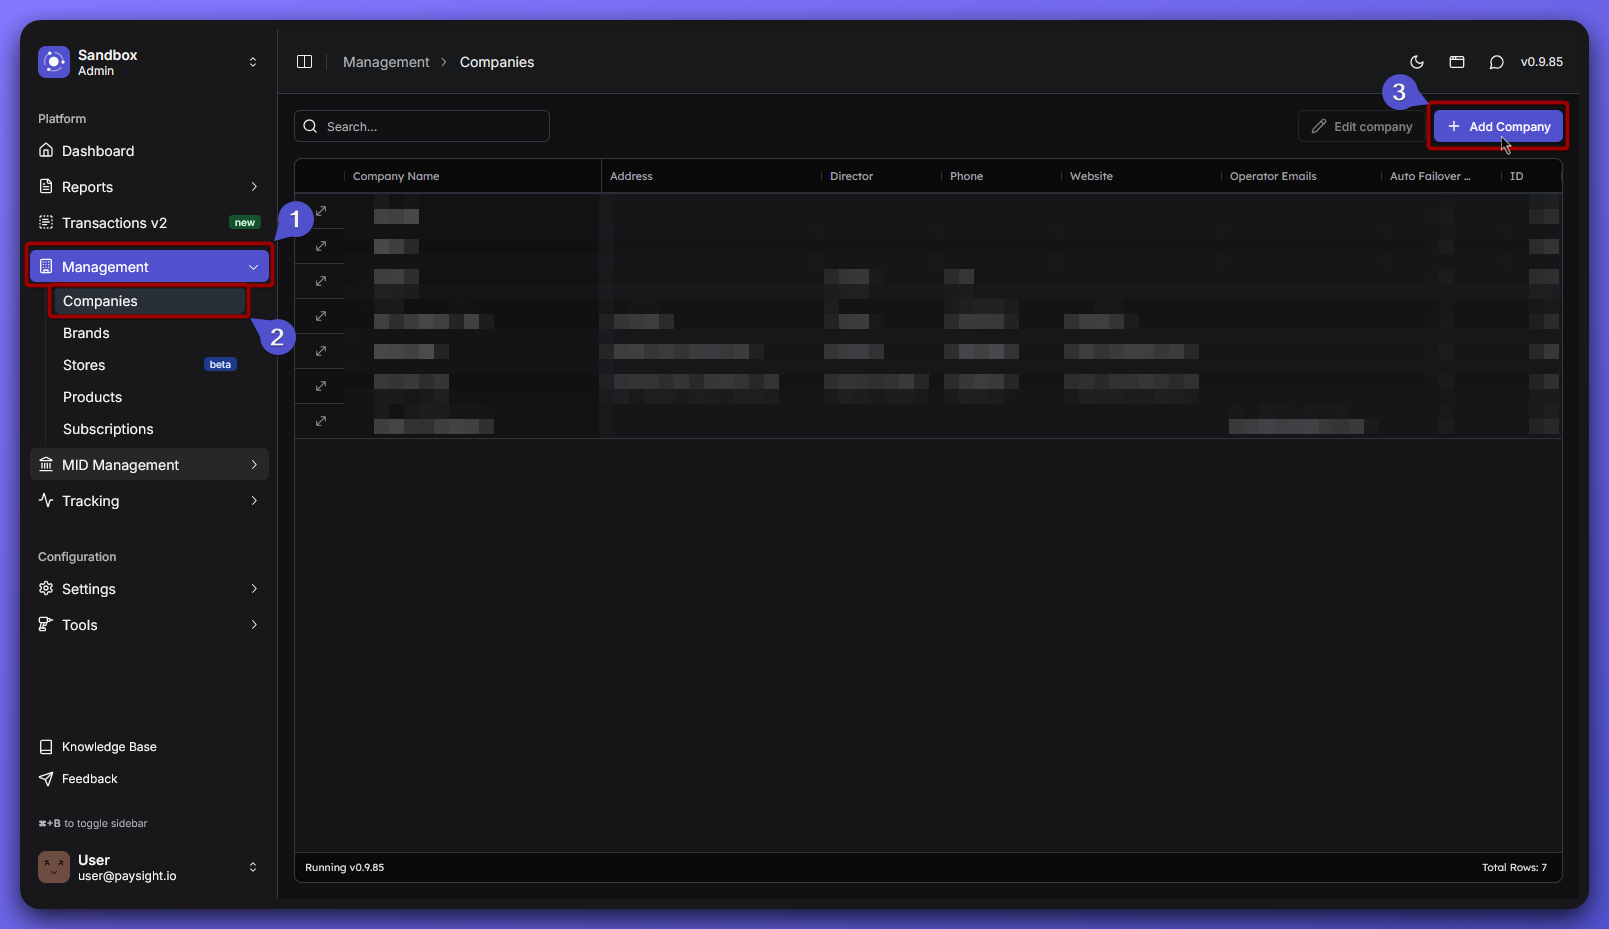
Creating a Company in Paysight Dashboard
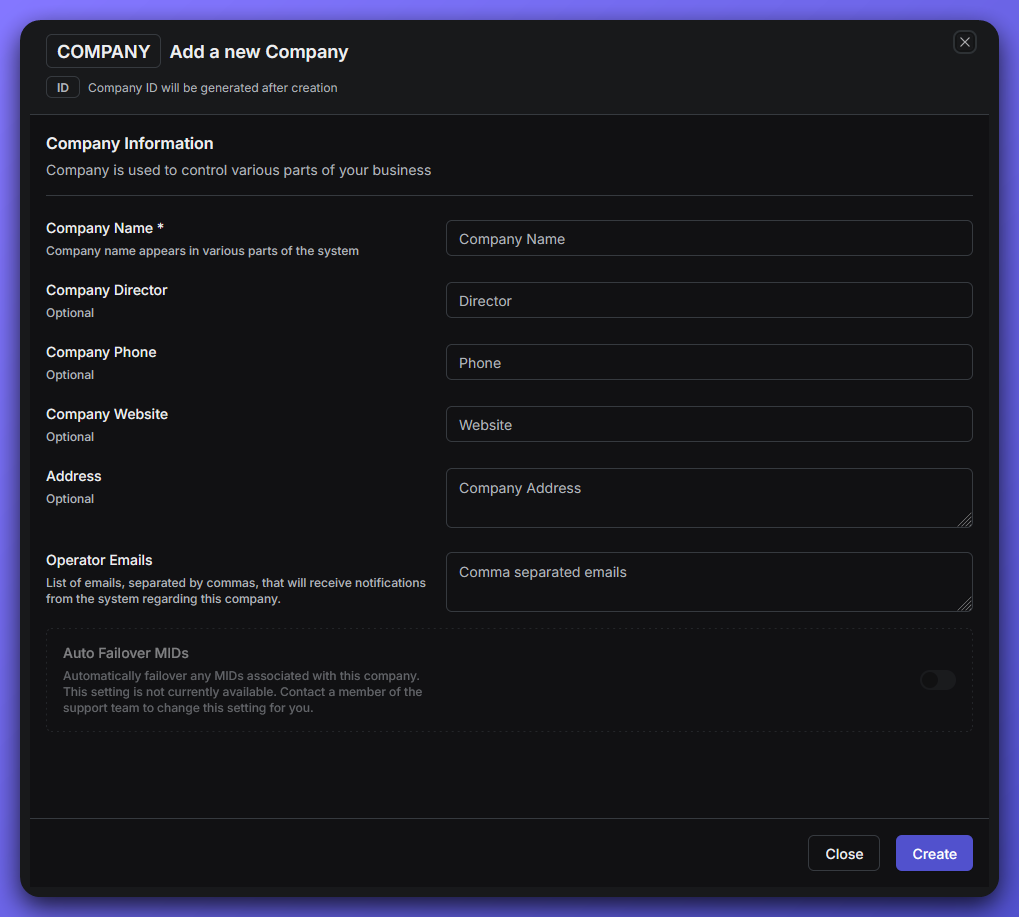
You’ll see a form with several sections. Here’s what each field means and how to fill it out.Fill out the Company Form

- Company Name: This is the official name of your company as it will appear throughout Paysight. It’s required and helps identify your business in the dashboard and on any communications.
Example: Paysight Ltd. - Optional Fields
- Company Director: Enter the name of the person who leads or manages the company. This can be useful for internal reference but isn’t required to complete the setup.
- Company Phone: Add a contact phone number for your company. This can be used for notifications or support purposes, but you can leave it blank if you prefer.
- Company Website: Enter your company’s website URL. This helps link your Paysight account to your online presence and can be helpful for verification or branding.
Example: https://paysight.io - Address: Provide your company’s physical address. This is useful for records and may be needed for certain payment processing requirements, but it’s not mandatory for setup.
- Operator Emails: List the email addresses (separated by commas) of team members who should receive notifications about this company. This ensures the right people stay informed about important updates or issues.
Example: [email protected], [email protected]
What’s Next?
You can start creating a brand and if you already have one, then you can start creating a merchant account (MID), so you can start configuring your subscription model.1. Brand
Brand is your business’s identity in Paysight, name, website, and contact details that customers see. Use brands to organize your offerings, and create multiple brands if you run different businesses or target various audiences.
2. Merchant Account (MID)
Merchant account lets your business take card payments online or in-store, and keeps those payments organized and secure
If you’re not sure about any field, you can always ask your Paysight onboarding manager or check your shop’s website and support contacts.
