Who is this for?
This guide is for anyone setting up a new product for your store in Paysight. Follow these steps to add your MID details for your store.Pre-requisites
1. Merchant Account (MID)
At least one MID account has been set up in your account to link it to the product.
2. Brand
At least one brand details to link it to the product.
3. Subscription
At least one subscription model to link it to the product.
Creating a Product
Navigate to MID Management
Go to Management > Products in your Paysight Dashboard.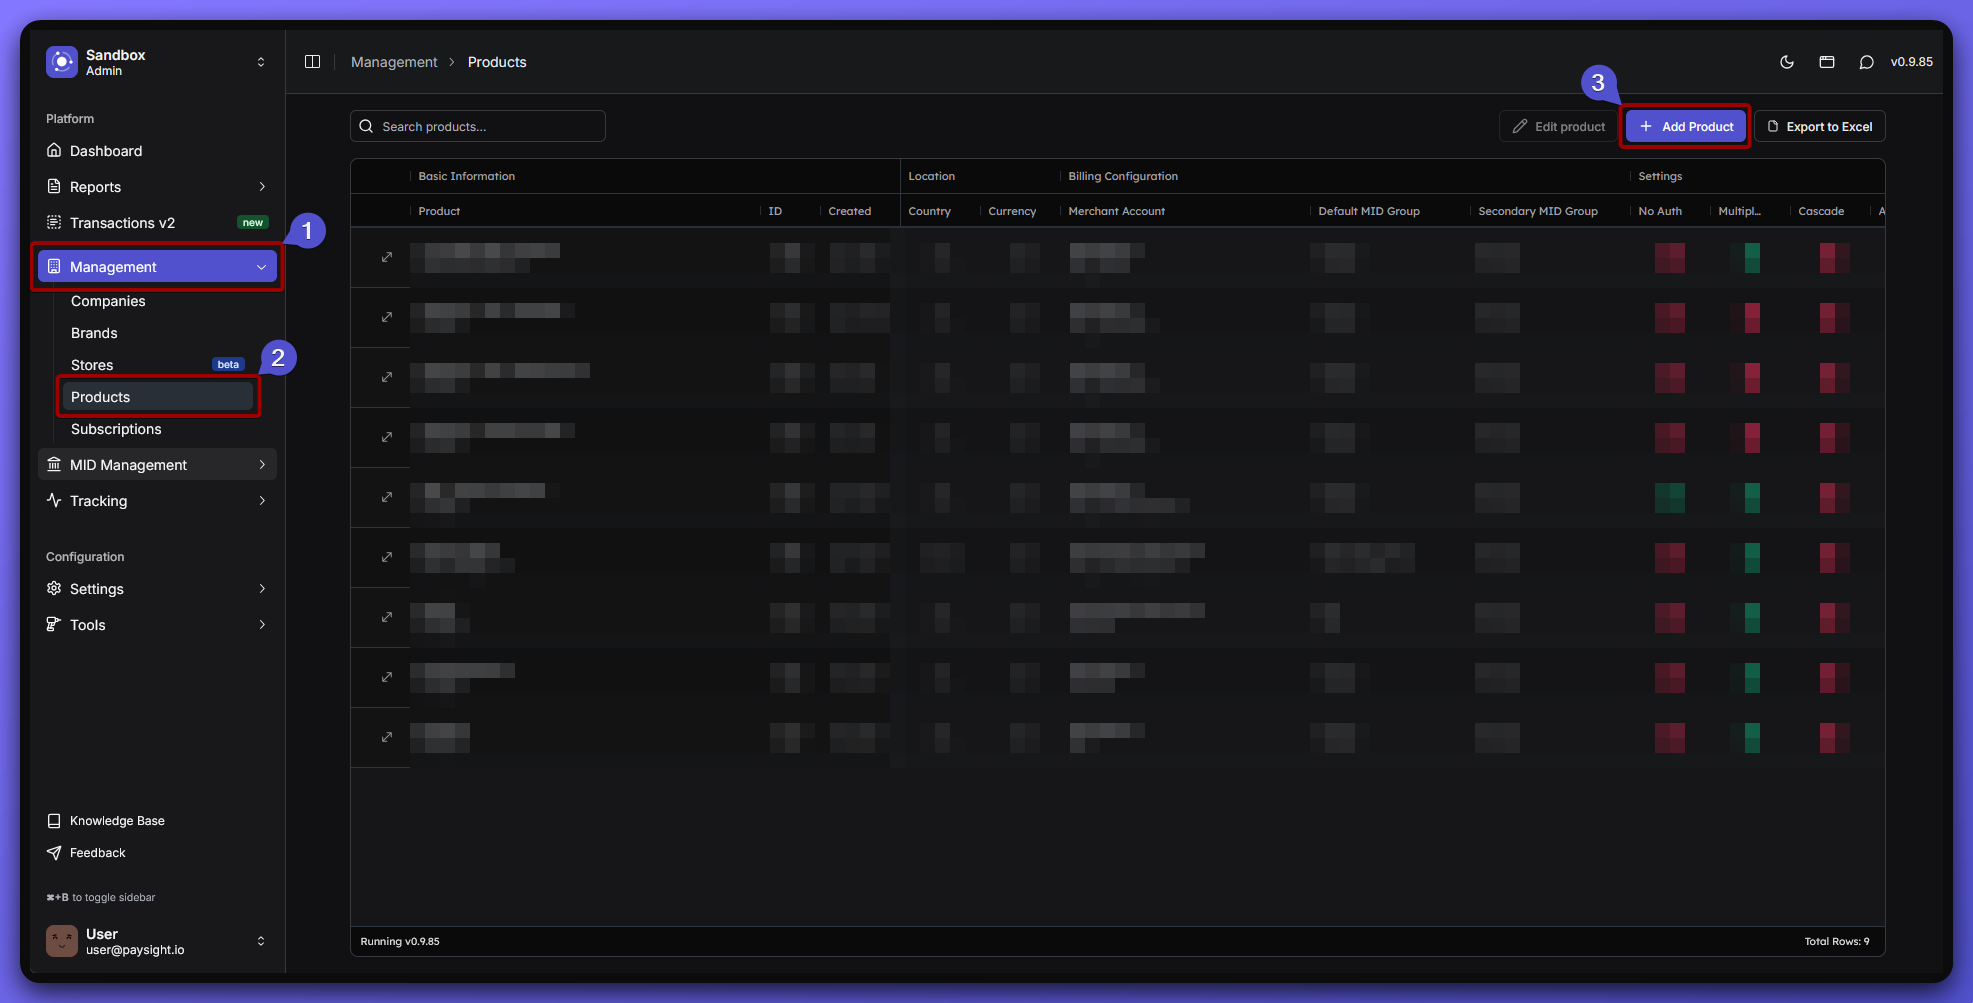
Fill out the Product Form
You’ll see several sections to fill out for your merchant account.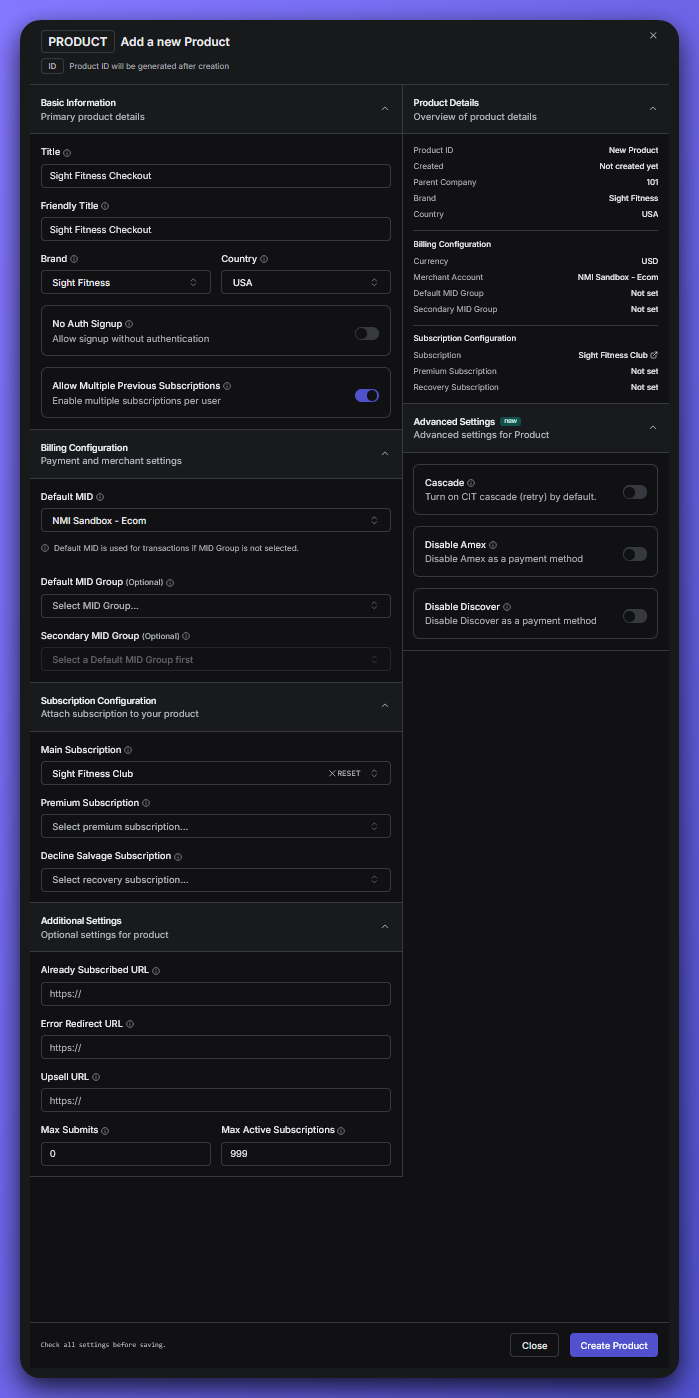
Basic Information
- Title: The main name for your product, shown to customers and in reports.
Example: Sight Fitness Checkout - Friendly Title: An internal label, use something descriptive for your product (can be the same as title above).
- Brand: Select which brand this product belongs to.
Example: Sight Fitness
The “Sight Fitness” example was created in Management > Brand, ensure you create a brand first before moving on to creating a product.
- Country: The country where this product is offered or sold.
- No Auth Signup: Allow users to sign up without an initial payment authorization (toggle on/off).
- Allow Multiple Previous Subscriptions: Let users have more than one active subscription to this product (toggle on/off).
Billing Configuration
- Default MID: Choose the main merchant account for processing payments for this product.
Ensure that you at least have one merchant account and has been tested and approved.
- Default MID Group: Select a group of merchant accounts for handling recurring payments. (Optional)
- Secondary MID Group: Use this group for backup or special routing of transactions. (Optional)
Subscription configuration
- Main Subscription: Choose the primary subscription model to this product. Example: Sight Fitness Club
The “Sight Fitness Club” example was created in Management > Subscription, ensure you create a subscription model first before moving on to creating a product.
- Premium Subscription: Link a premium or upgraded subscription plan. (Optional)
- Salvage Subscription: Pick a fallback subscription if a payment fails, to try recovering the customer. (Optional)
Additional Settings
- Already Subscribed URL: Where users are sent if they try to sign up but already have an active subscription.
- Error Redirect URL: Where users are sent if there’s an error during signup or checkout.
- Upsell URL: Send users to this page to offer them an upgrade or add-on after signup.
- Max Submits: The maximum number of times this product can be submitted.
- Max Active Subscriptions: The maximum number of active subscriptions allowed for this product.
Advanced Settings
- Cascade: Enable automatic retry of failed payments using alternative MIDs (toggle on/off).
- Disable Amex: Block American Express as a payment method for this product.
- Disable Discover: Block Discover cards as a payment method for this product.
If you’re not sure about any field, you can always ask your Paysight onboarding manager or check your shop’s website and support contacts.