
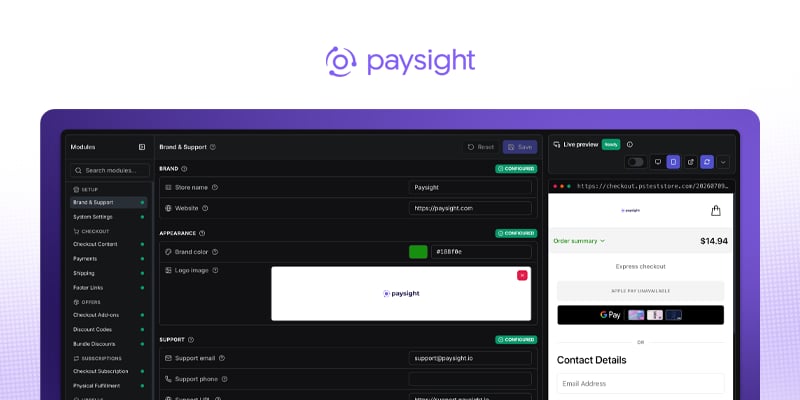
Editor Overview
Use the Shopify Checkout Editor to manage an active Shopify store after onboarding is complete. Each editor module has its own page in this section.If your store is still pending setup, finish Shopify Store Onboarding first.
Open the editor
1
Go to Shopify Stores
Open Shopify Stores in Paysight.
2
Select an active store (onboard a store if you do not have one yet)
Use the Active tab to find the store you want to edit.
3
Open the editor
Select Edit Checkout to open the Checkout Editor.
How the editor works
Modules
Settings are grouped into modules such as Checkout Content, Payments, Shipping, Pixels, and Checkout Code Blocks.
Search
Use module search to quickly find a setting area by name or feature such as Shipping, Upsells, Tracking.
Live View
Saving checkout changes makes your changes instantly live.
Validation
Resolve validation messages before saving checkout configuration.
Go Live Checklist
Select Live checklist in the editor header to review launch readiness without leaving the editor. The checklist links directly to the modules that need attention.
Editor Modules
The Checkout Editor groups settings by purpose so you can work on one part of the customer experience at a time. Use the help tooltips beside fields and section headings for implementation-specific guidance.
Setup
Brand, support, and system settings.Brand & Support
Customer-facing brand, logo, support contact details, and footer links.
System Settings
Paysight system identity, domains, region, currency, and checkout display conversion.
Checkout
Checkout content, layout, shipping, and footer links.Checkout Content
Checkout labels, policy notice, reserve copy, country/address behavior, address autocomplete, and pay button text.
Payments
Modern card submit, express wallets, wallet styling, 3DS, supported cards, and sandbox flags.
Shipping
Shipping products, display prices, ordering, and Shopify shipping-line behavior.
Footer Links
Checkout footer links, policies, and support destinations.
Offers
Add-ons, discount codes, and bundle discount rules.Checkout Add-ons
Optional products shown during checkout, including defaults and cart visibility.
Discount Codes
Store discount entries and values.
Bundle Discounts
BOGO, fixed, percentage, product-specific, and store-wide discount rules.
Subscriptions
Subscription checkout behavior and physical fulfillment mapping.Checkout Subscription
Straight-sale mode, subscription terms, cart subscription display, and subscription copy.
Physical Fulfillment
Cart triggers, subscription IDs, physical products to ship, and fulfillment metadata.
Upsells
Post-purchase upsells, upsell flow, and order handling.Upsell Offers
Post-purchase offer strategies, products, content, shipping, triggers, and active state.
Upsell Flow
Accept/decline routing and initial upsell selection.
Upsell Order Handling
Separate order modes, individual order mode, payment waiting, and decline override.
Tracking
Pixels, GTM, attribution, behavior analytics, and diagnostics.Pixels
Tracking pixels, event filters, default pixel behavior, and diagnostics.
GTM Events
GTM container IDs, standard events, and custom event names.
Attribution
Hyros and other attribution-specific identifiers.
Behavior Analytics
Microsoft Clarity and Hotjar project IDs.
Integrations
Checkout event actions and marketing integrations.Marketing Integrations
Connect email/SMS marketing platforms (Omnisend) to checkout lifecycle events.
Event Actions
Checkout event action references and delivery configuration.
Operations
Shopify sync behavior, store tests, refreshes, and logs.Store Operations
Shopify order sync, batching, product refresh, store test, and conversion logs.
Advanced
Custom checkout code for carefully reviewed changes. Paysight admins also have access to internal configuration and legacy tools in this group.Checkout Code Blocks
Custom HTML, CSS, and JavaScript injected into checkout.
Safe editing checklist
1
Make a focused change
Edit one module or one related set of settings at a time.
2
Review preview and validation
Check the preview and resolve validation messages before saving.
3
Save changes
Save the module and confirm the editor no longer shows unsaved changes.
4
Test checkout
For payment, shipping, tracking, upsell, and Checkout Code Blocks changes, run a checkout test before treating the update as live-ready.
Admin Settings and Raw Config are internal Paysight tools and are not customer-facing editor modules.